Writing guides
This page is for authors and admins: everyone who writes guides in kataba. It goes from a new, empty guide through steps, step images and annotations to publishing, and ends with who may see and edit a guide and how to take it to another kataba instance.
If you are new to kataba, read Reading guides first: it shows what your readers will see.
Creating a guide
Open the category the guide belongs in and choose New guide. Give it a title, check the category, and enter the language the guide is written in, as a code such as en or de. The description is optional; it introduces the guide above its first step, so it is the place for what the guide is about and what readers need.
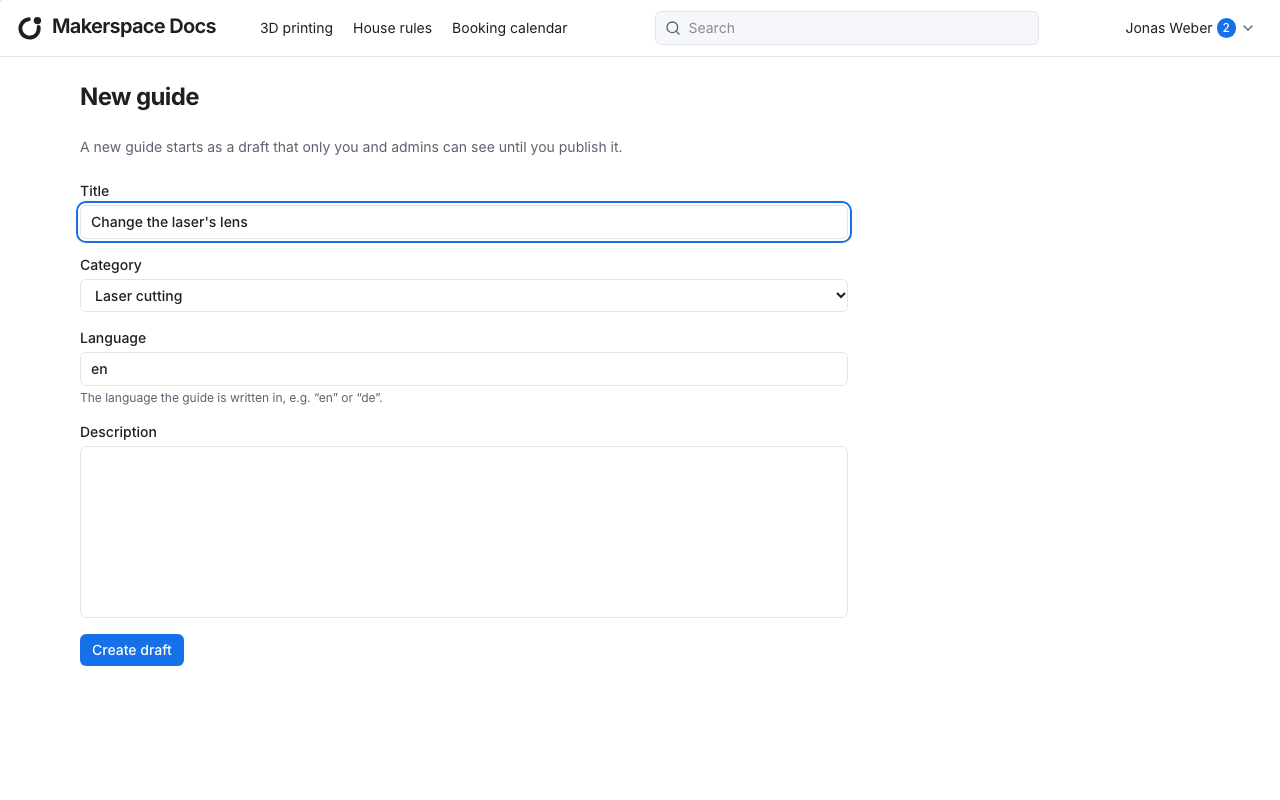
Create draft creates the guide as a draft: only you and the admins see it until you publish it. kataba opens it in the editor, where you add the steps and, in the Media tab, a cover image.
Starting from an existing guide
To write a guide much like one that exists, open that guide and choose Duplicate in its guide actions menu, "…". The copy is a new draft of yours, in the same category, with the steps, images, annotations and attachments of the original's working copy, but without its versions.
The guide editor
The editor has three parts: the guide's title, language and description at the top, the steps below them, and the guide's properties on the right.
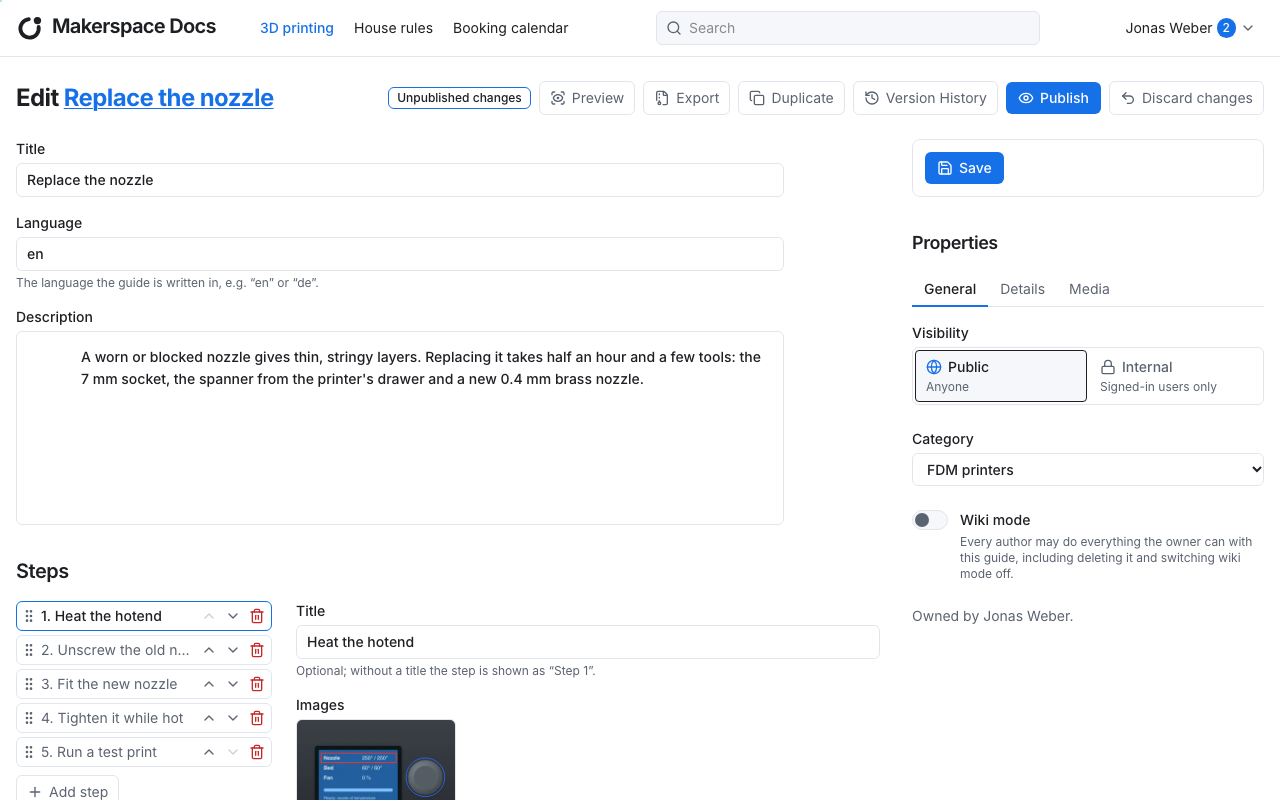
The buttons at the top lead to the preview, export, duplicate and the version history. Publish and Discard changes show only when there is something to publish or discard, see Drafts, publishing and versions.
Save in the properties saves everything you changed, the open step included. Images, the cover image and attachments are different: they are saved as soon as you add them. If you leave the editor or open another step with unsaved changes, kataba asks whether to discard them.
Editing together
Several people may have one guide open at the same time. If someone else saved a step or the guide's properties after you opened them, your save is refused, so it never overwrites their changes; reload the page and make your change again.
Steps
The list on the left holds the guide's steps. Add step adds one at the end. Click a step to open it, drag it by its handle or use the arrows to move it, and the bin to delete it.
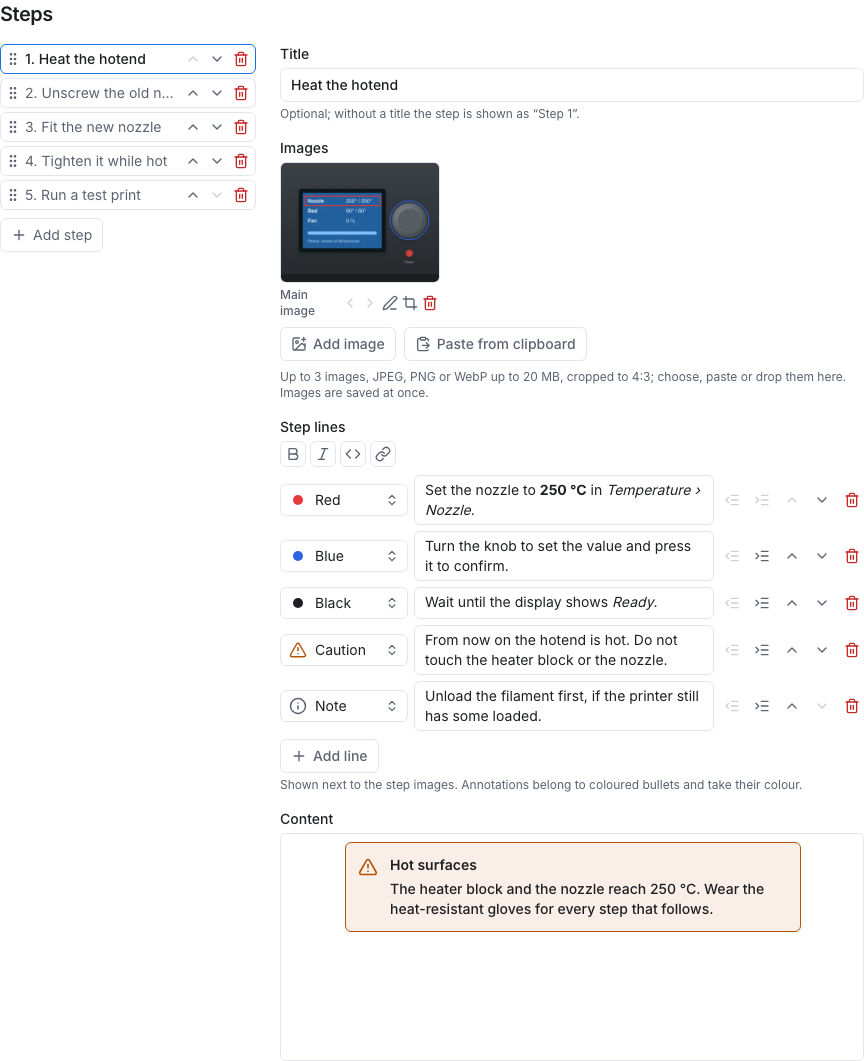
A step is made of:
- a title, optional: without one the step is shown as "Step 1", "Step 2" and so on,
- up to three step images,
- the step lines,
- free-form content below the lines.
Step images
Step images are photos in the format 4:3. Add one with Add image, with Paste from clipboard, or by dropping it onto the images; JPEG, PNG and WebP files up to 20 MB are taken. kataba asks you to crop it to 4:3 when you add it.
The first image is the step's main image, which readers see first. Under each image you find buttons to move it left or right, to annotate it, to crop it again and to delete it. Cropping an image again discards its annotations, since they would no longer sit where they belong.
Taking good step images
Photograph in landscape, so the 4:3 crop keeps most of the picture, and leave a little room around what matters. A plain background and even light make annotations easy to see.
Step lines
Step lines are the instructions next to the images, one line per thing to do. Add line adds one. Each line has a kind or colour on its left and its text on its right.
- Coloured bullets: red, orange, yellow, green, light blue, blue and violet. A coloured line can have annotations, which take its colour, so readers see which line explains which mark on the image.
- Black bullet: a plain line without annotations.
- Icon lines: Caution for a danger, Note for a hint and Reminder for something not to forget. They have no colour and no annotations.
The buttons on the right of a line indent and outdent it, move it up or down, and remove it. A line can be indented by one level more than the line above it, at most two levels, to add detail to it. The toolbar above the lines formats the selected text as bold, italic or code, or makes it a link.
A step may have up to 50 lines. Keep each line to one action: "Turn the nozzle anticlockwise with the 7 mm socket" is easier to follow than a paragraph.
Changing a line that has annotations
Annotations belong to their line. Removing a line, or making it black or an icon line, deletes its annotations when you save the step. kataba asks before it does.
Step content
The content below the step lines is rich text for what does not fit into lines: background, a longer explanation, a table of values written out as a list. The description of the guide is rich text too. Both offer these blocks:
- headings, paragraphs, bulleted and numbered lists, quotes and code,
- callouts: highlighted boxes with an optional title and a message, as a warning, an error, a note or a success, each with its own icon and colour.
Click into the content and press Tab or the "+" at the start of an empty line to choose a block. Select text to make it bold, italic, code or a link.
References
A reference points to another guide, a category or a page, for example "see Level the bed". Select the words to replace, choose the bookmark in the toolbar above them, type part of the title and pick the guide, category or page from the list. The reference takes the title of what it points to and is kept whole: to change it, select it and choose the bookmark again, which turns it back into plain text.
Readers always see the current title: after a guide is renamed and published, every reference to it follows. Hovering over a reference shows a card with the cover image or category image and the title. A reference to something a reader may not see, such as an internal guide for guests, a draft or a deleted guide, shows its text without a link. In the PDF a reference is a link to the full address.
References work in a guide's description and step content, a category's description and a page's content. An exported guide keeps its references; imported into another instance, a reference whose target is not there shows as plain text.
Columns, tables, images and spacers are only available on pages, not in guides. Files to download belong to the whole guide, as attachments in the Media tab.
Annotations
Annotations are rectangles and circles drawn on a step image to point at a part of it. Each annotation belongs to one coloured step line of the same step and takes its colour.
To annotate an image, first add the coloured lines to the step and save it; then choose the pencil below the image.
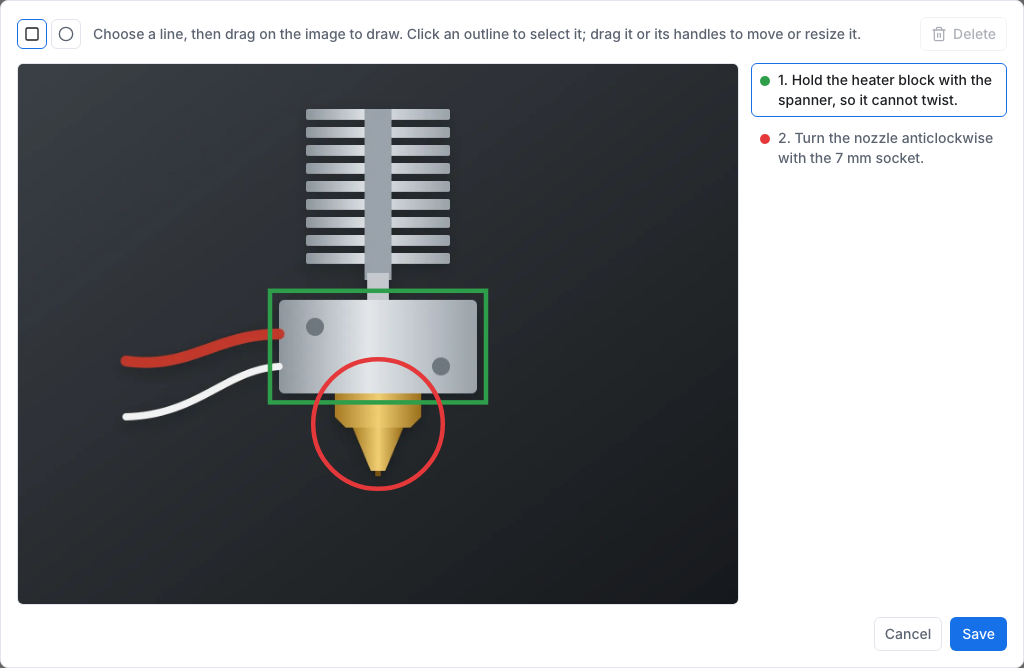
- Choose the rectangle or the circle at the top left.
- Choose the line the annotation belongs to, on the right.
- Drag on the image to draw it.
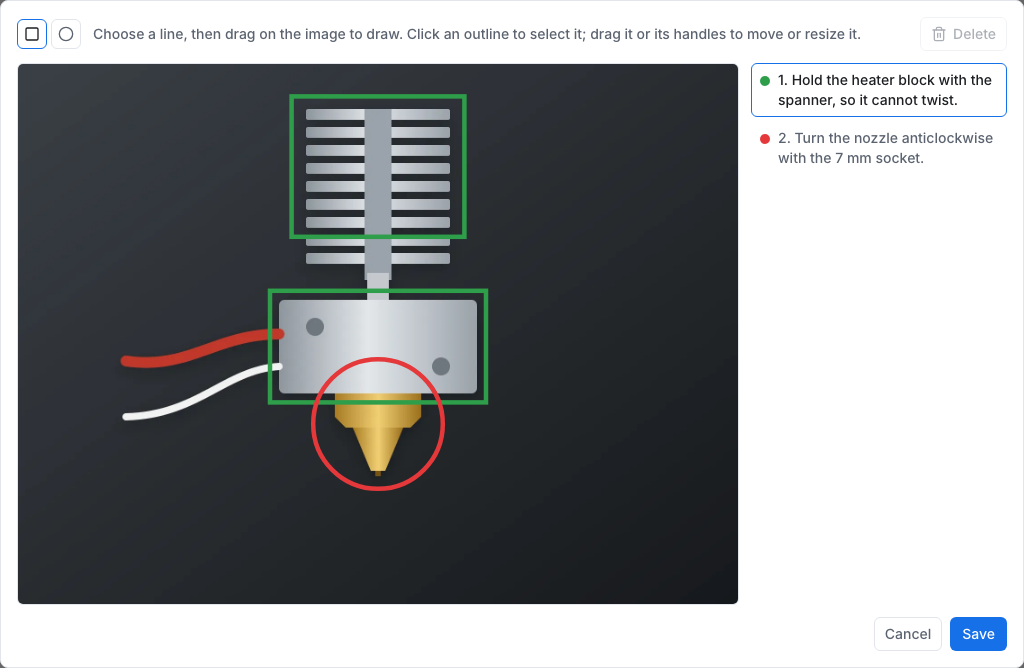
Click an annotation to select it; drag it to move it, or drag its handles to resize it. With the keyboard, the arrow keys move a selected annotation, Shift and the arrow keys resize it, and Del removes it. Save stores the image's annotations, up to 30 per image.
Readers see the annotations on the image, and clicking a coloured line highlights its annotations (see Steps). Use a few annotations per image: one rectangle around the part to grip and one circle around the part to turn says more than many marks.
Properties
The properties on the right side of the editor are split into three tabs.
General
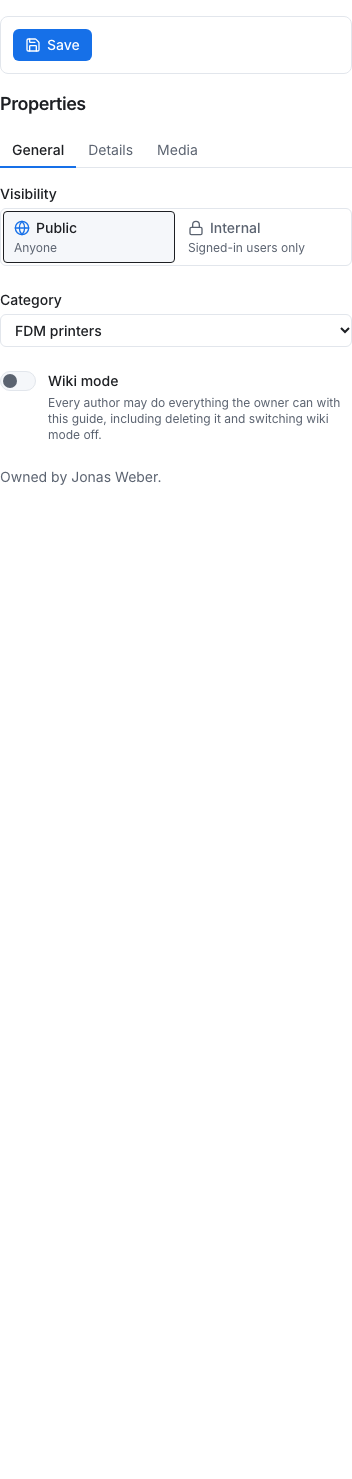
- Visibility: public or internal.
- Category: where the guide lives. Changing it moves the guide.
- Wiki mode: lets every author edit the guide.
- The guide's owner; admins can transfer ownership here.
Details
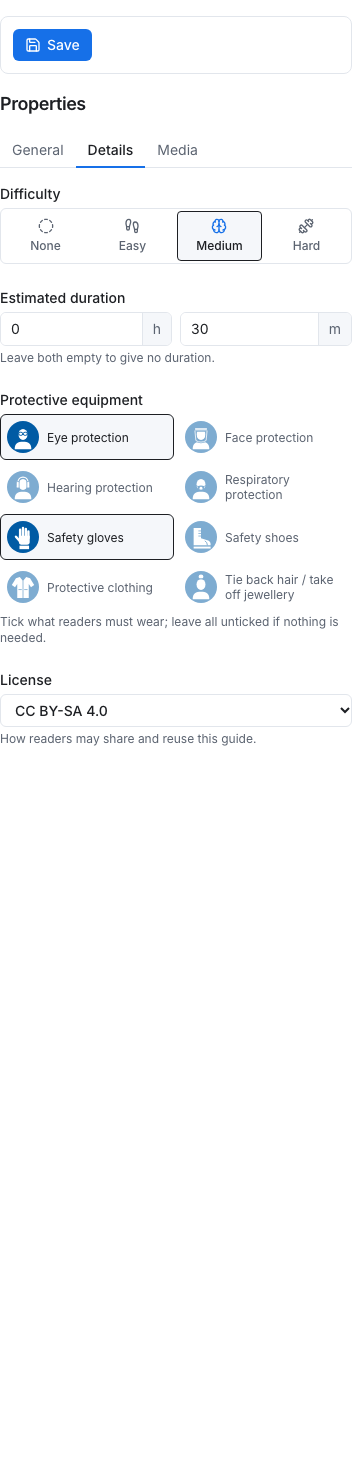
- Difficulty: easy, medium or hard, or none.
- Estimated duration: about how long following the guide takes, in hours and minutes. Leave both empty for none.
- Protective equipment: what readers must wear. Readers see each as a pictogram above the description and in the step-by-step view.
- License: how readers may share and reuse the guide. New guides start with the instance's default license.
Media
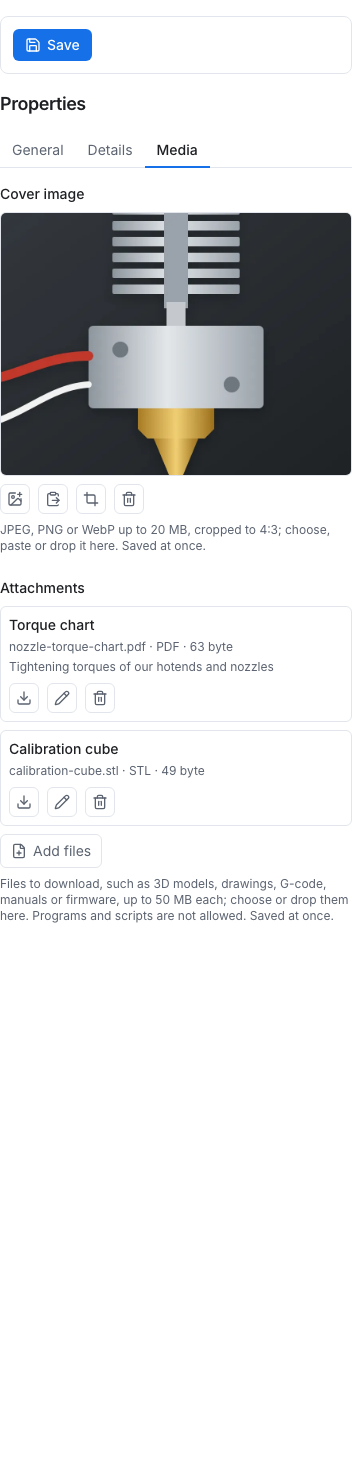
- Cover image: the 4:3 image that represents the guide in category grids and on the start screen of the step-by-step view. Without one, the guide is shown as a coloured tile.
- Attachments: files that come with the guide, such as 3D models, drawings, G-code, manuals or firmware. Add them with Add files or by dropping them here, and give each a name and an optional description. Readers always download attachments, they never open in the browser. Programs and scripts cannot be attached, and the largest file allowed is a setting, 50 MB at first.
Drafts, publishing and versions
Drafts
Until it is published, a guide stays a draft that nobody else finds in categories or search. Write and save as often as you like; publish when it is ready.
Preview
Preview shows the working copy as readers would see it, with everything you saved so far, without publishing it.
Publishing
Publish first saves any unsaved changes, then asks for an optional change note: what changed in this version.
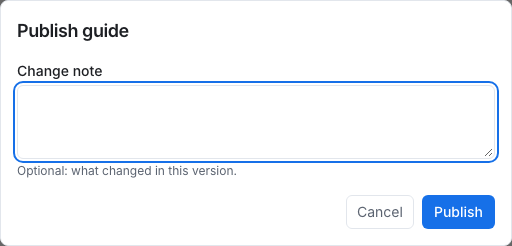
Publishing makes a version: a fixed record of the guide's content at that moment, with the time, who published it and the note. Readers, from now on, see this version.
Editing a published guide
The editor always works on the guide's working copy. Once a guide is published, your saved changes go into the working copy, and readers keep seeing the latest version until someone publishes again. So you can rework a published guide over several days without readers seeing it half done.
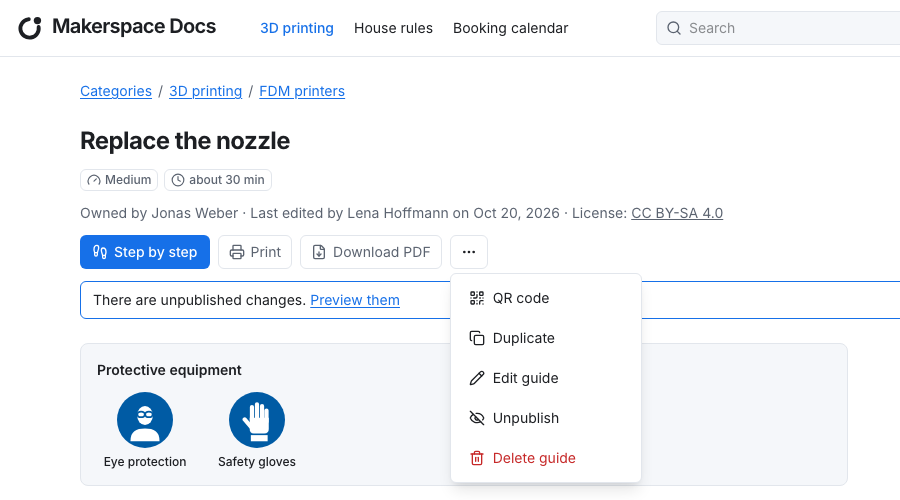
While the working copy has changes that are not published, the editor shows Unpublished changes, and the guide's reading view tells those who may edit it so, with a link to the preview.
- Publish makes the changes visible as a new version.
- Discard changes throws them away: the working copy goes back to the latest version.
What a version holds is the guide's content: title, description, language, difficulty, duration, protective equipment, license, cover image, attachments and the steps with their lines, images and annotations. The visibility, the category, wiki mode and the owner are not versioned; changing them takes effect at once.
Version history
Version History shows all versions of the guide, one at a time, as readers saw them. Move the slider to step through them; the last mark is the working copy, if it has unpublished changes.
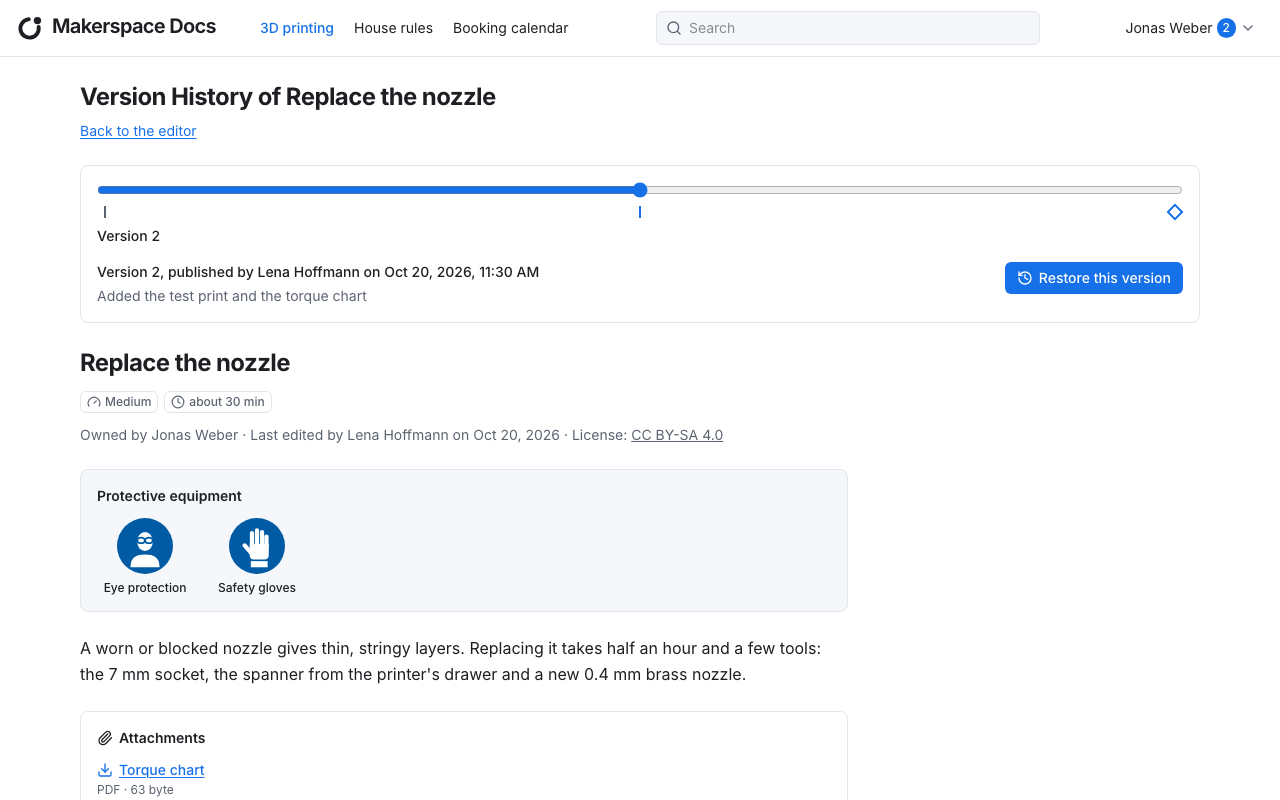
Restore this version replaces the working copy with the version shown. Nothing is published by that: publish afterwards to make the restored content the latest version again, as a new version.
Unpublishing and deleting
In the guide's guide actions menu, "…", Unpublish turns a published guide back into a draft that only those who may edit it see; its versions are kept, and publishing it again brings them back. Delete guide removes the guide. Admins can restore deleted guides.
Visibility
Every guide and every category is either:
- Public: everyone sees it, also guests who are not signed in.
- Internal: only signed-in users see it.
The most restrictive visibility wins: a guide is only public if it and every category above it are public. A public guide in an internal category is internal, and the editor tells you so. A guide can be made stricter than its category; setting it looser has no effect.
Visibility only applies to published guides; a draft is visible only to those who may edit it.
Ownership and wiki mode
The author who creates a guide is its owner. By default, only the owner and the admins may edit a guide.
Wiki mode opens a guide to all authors: every author may then do everything the owner can with it, including publishing, unpublishing, deleting it, changing its visibility and switching wiki mode off again. Switch it on for guides that many people keep up to date, such as house rules or a machine's maintenance.
Only admins can transfer ownership to another author or admin, in the General tab. If an owner loses the author role, their guides stay; admins, and authors through wiki mode, can still edit them.
Problem reports
Readers can report a problem with a guide, or with one of its steps, from its reading view (see Reporting a problem). Problem reports in the menu under your name lists the reports on the guides you may edit: the ones you own and those in wiki mode. The number beside your name counts the reports still open. Admins find the same list, with every guide's reports, in the admin menu.
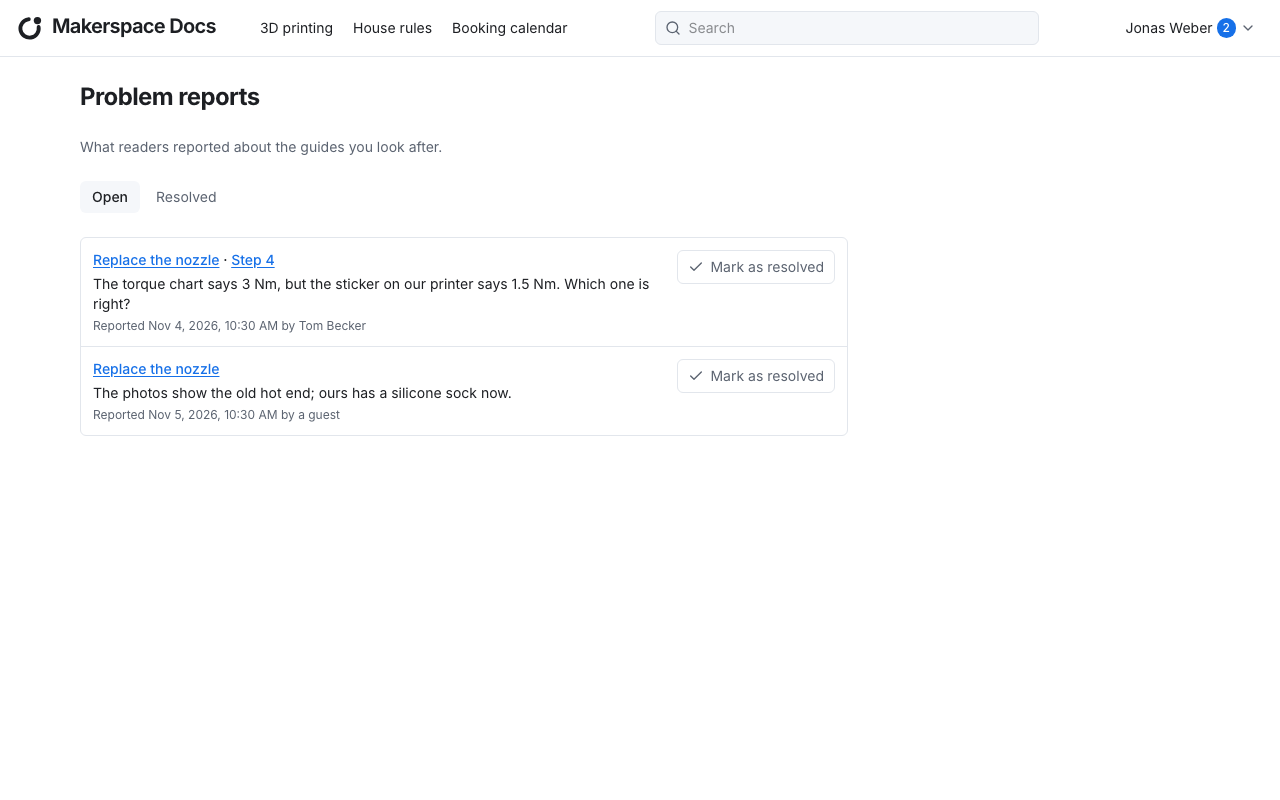
Each report names its guide and, if the reader chose one, the step as the reader saw it: the step's number in the published version. It shows what the reader wrote, and who reported it when. Once you have fixed the guide, or decided nothing needs to change, Mark as resolved. Resolved reports move to the Resolved tab, which notes who resolved them and when.
If the instance can send emails, a guide's owner also gets an email for every new report, in their interface language. Once the owner is no longer an author, the admins get it instead.
Exporting and importing guides
A guide package is a ZIP file of a guide, to take it to another kataba instance, for example from one makerspace to another.
- Export at the top of the editor downloads the guide's working copy as a package, with its images and attachments. Everyone who may edit the guide may export it. The package holds the guide's content only: not its versions, owner, visibility or wiki mode.
- Importing a package is for admins: they import it into a category, where it becomes a public draft of theirs, ready to check before they publish it. See Importing a guide.
A package from an older kataba can always be imported; one from a newer kataba needs the instance to be updated first.